
仓库地址:https://github.com/FunAudioLLM/CosyVoice
下载代码 git clone https://ghproxy.net/https://github.com/FunAudioLLM/CosyVoice
git clone --recursive https://github.com/FunAudioLLM/CosyVoice.git
cd CosyVoice
git submodule update --init --recursive
使用miniconda安装
conda create -n cosyvoice python=3.10
conda activate cosyvoice
此次可能安装出错,需要安装一下依赖,多执行几次,确保依赖全部安装完成。
pip install -r requirements.txt -i https://mirrors.aliyun.com/pypi/simple/ --trusted-host=mirrors.aliyun.comcuda环境根据需求安装,这里选择cuda11.8
pip下载pytorch太慢,可先用IDM下载pytorch
https://download.pytorch.org/whl/cu118/torch-2.5.1%2Bcu118-cp311-cp310-win_amd64.whl
然后安装
pip install -U G:\pytorch路径\torch-2.5.1+cu118-cp311-cp311-win_amd64.whl torchvision torchaudio --index-url https://download.pytorch.org/whl/cu118这两个安装多执行几次,确保安装完成
使用python执行下面程序,下载模型
from modelscope import snapshot_download
snapshot_download('iic/CosyVoice-300M', local_dir='pretrained_models/CosyVoice-300M')
snapshot_download('iic/CosyVoice-ttsfrd', local_dir='pretrained_models/CosyVoice-ttsfrd')
然后
cd pretrained_models/CosyVoice-ttsfrd/目录
解压 resource.zip
pip install ttsfrd_dependency-0.1-py3-none-any.whl
cd ../..
启动网页服务
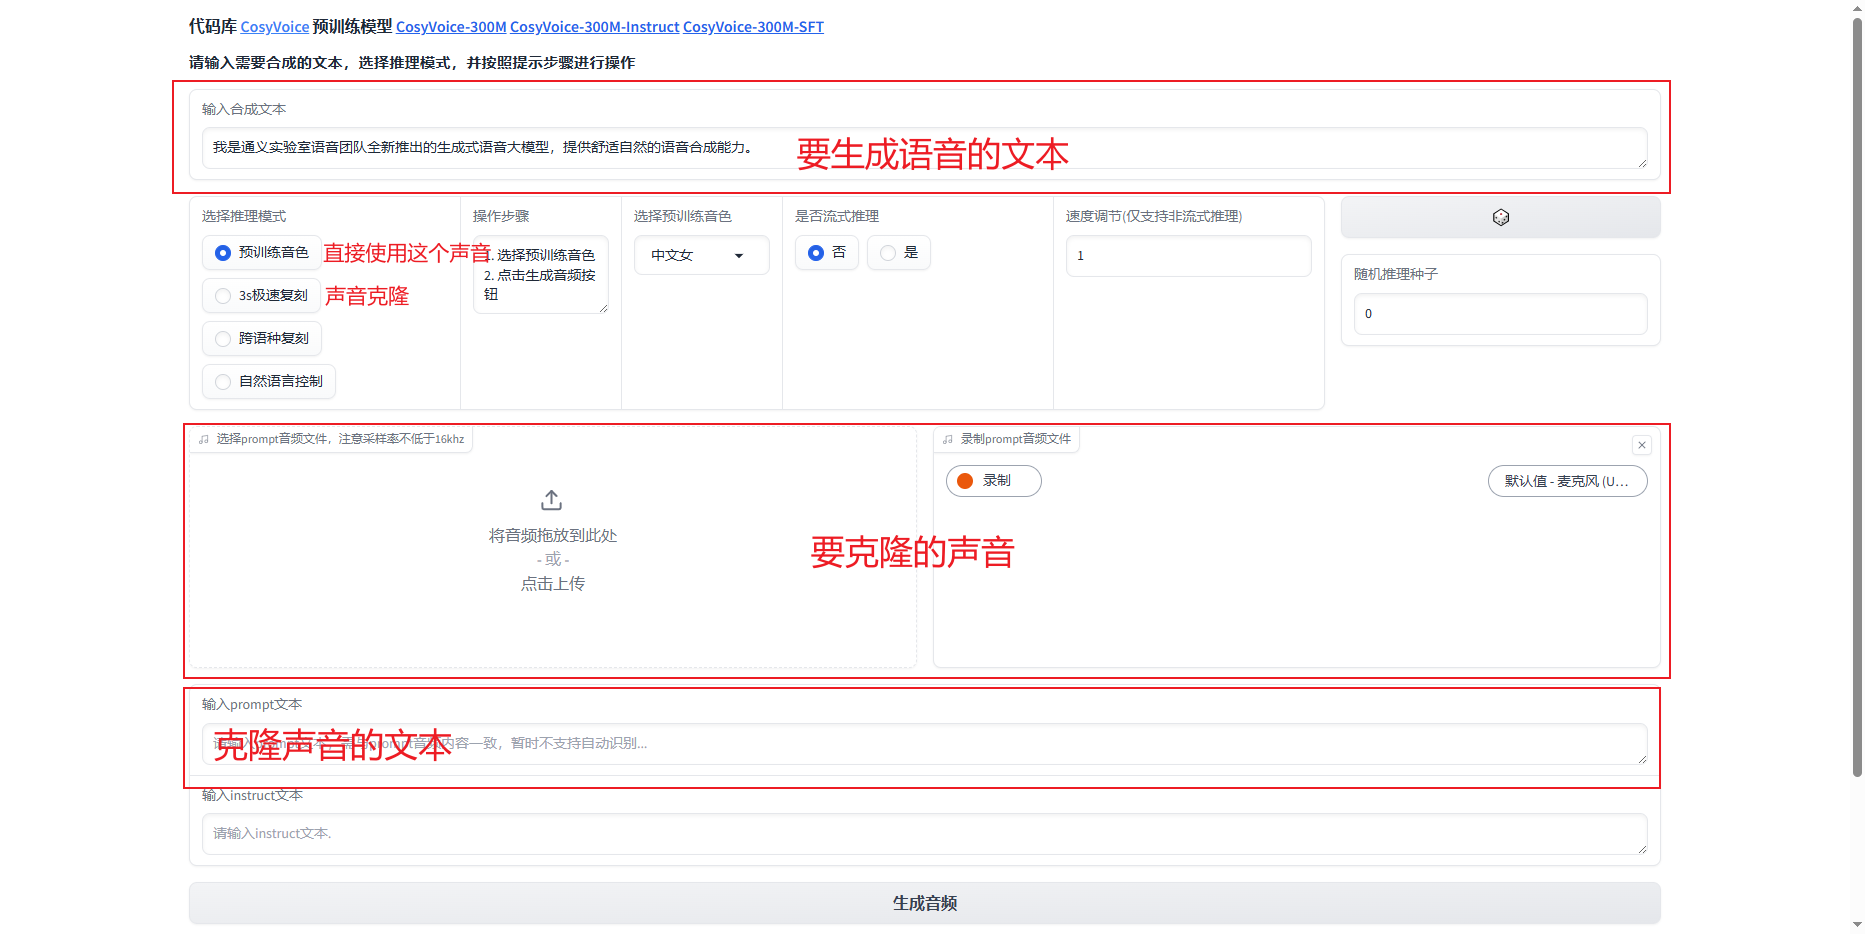
python3 webui.py --port 50000 --model_dir pretrained_models/CosyVoice-300M服务启动起来后,使用浏览器打开http://127.0.0.1:5000